Manage your respositories#
Connect a repository#
When you have your solver source code tracked in a Git repository, you can connect this repository to the platform. This is needed to allow the platform to access the source code to run it.
Important
Make sure to follow all the steps in the process below, specially step 3.d, where you have to go to your Git server (GitHub, for example) and add the Deploy Key provided by the Platform.
To connect a repository to the platform:
- Go to the section Solvers > Repositories through the left side menu
- Then, on the top-right corner, click on the Connect a new repository button.
- You will get the repository connection wizzard where you can do all the required steps:
- Select the solver which is hosted in this repository.
- Fill the repository information: name and SSH URL (valid SSH URL in your git server).
- Generate an SSH key pair to ensure controlled and secure access to your code.
- Go to your Git server: Your repository > Settings > Deploy keys and add the generated key.
- Click the Connect button at the end of the wizzard to complete the process.
At this moment, your repository is connected and you just have to wait until the solver update process finishes.
You will see your new repository marked as Connected when this is done.
Assign a solver to a connected repository#
When you have registered a solver but no assigned it to a repository yet, you will see this message on the right sidebar:
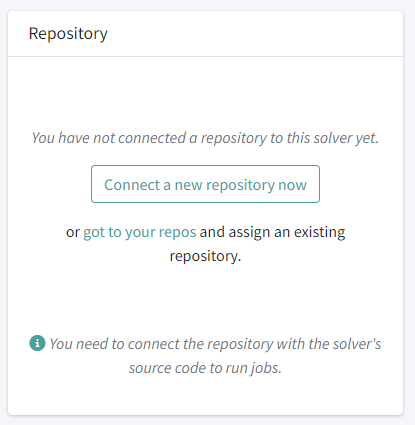
You can do two things:
- Connect a new repository (see section above)
- Go to an existing repository and assign this solver to it.
To do the seccond:
- Go to the Repositories section via the left-side menu.
- Click on the one that is hosting this solver source code, to access the repo details page.
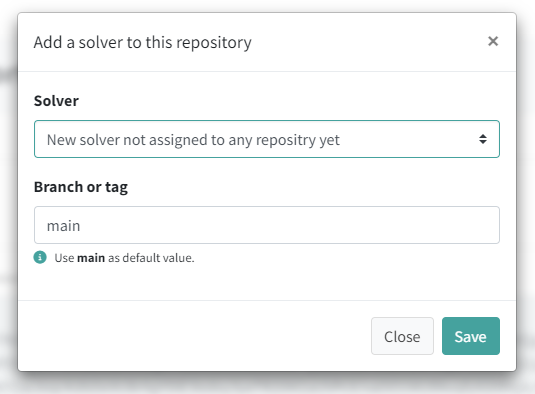
- Click the button Add another solver
-
Select the solver from the list and type the name of the branch or tag you want to use for this solver.
-
Click the Save button.
After this, you can click the Pull button to pull the code and build the solver (see the next section for more details).
Pull and rebuild your solver#
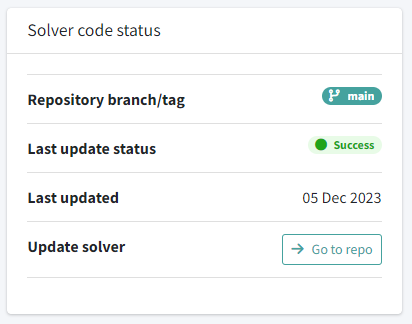
From your solver details page, click the button Go to repo on the right sidebar:
When you are in the repository details page, click the Pull button next to the solver you want to rebuild.
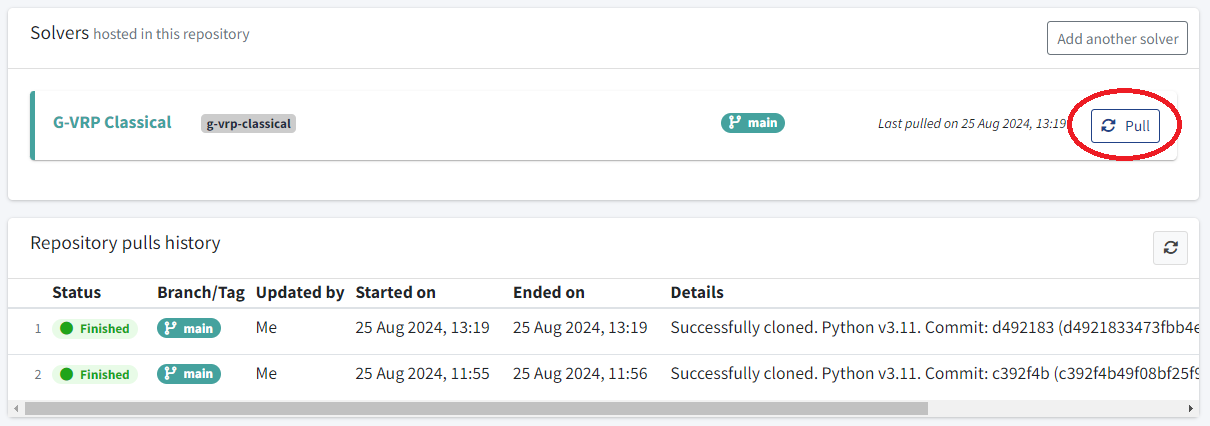
Below, you can check the pulls history. Just wait until this process is shown as Finished and make sure the commit pulled is the one that you just pushed to the Git server.
Now, your solver is ready to run jobs in the platform.