How to run a job (execute the solvers)
With QCentroid’s no-code executions feature, you can launch jobs directly from the platform dashboard without writing a single line of code.
You can run any use case and any solver that is available to you.
To launch a job:
- Navigate to the Jobs section via the left-side menu.
-
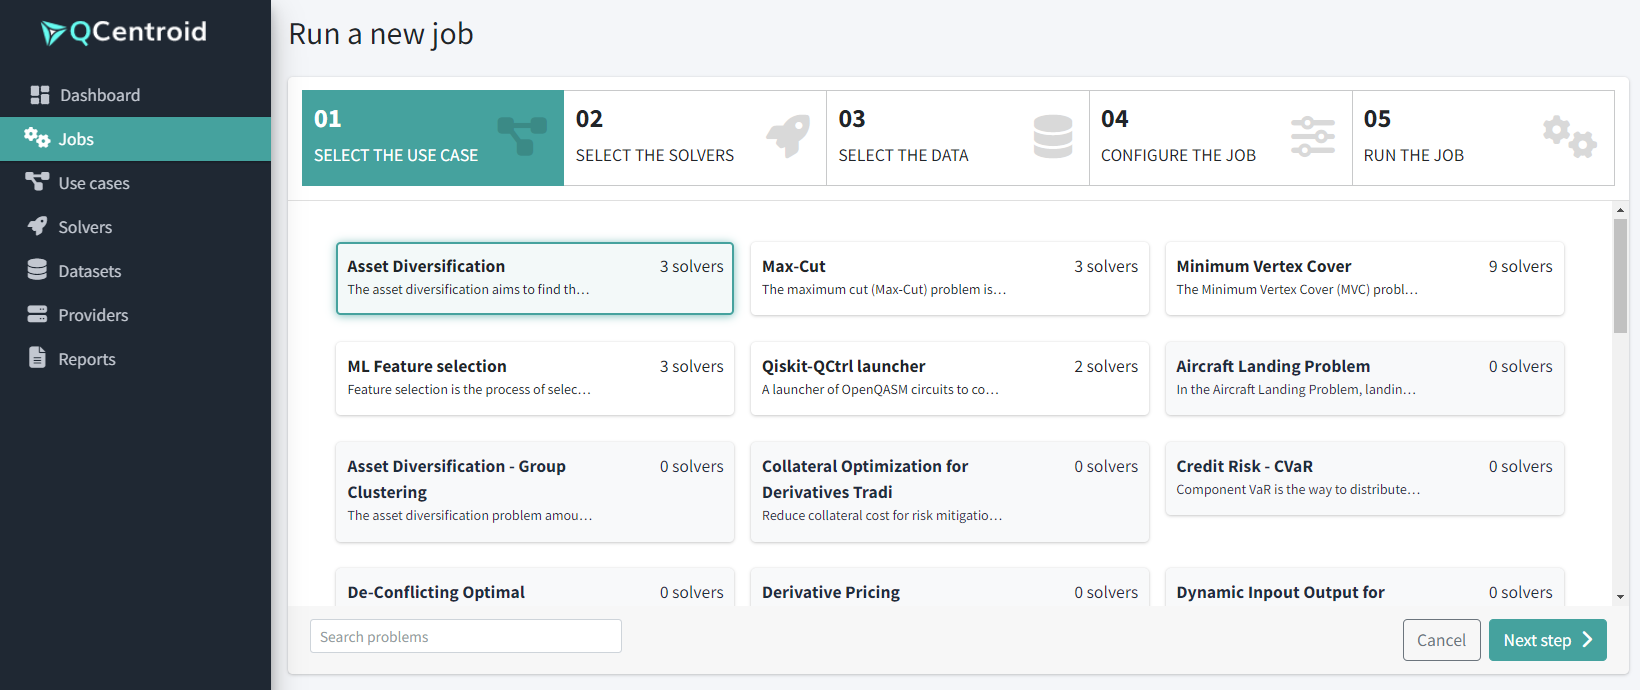
Click the Run job button, and proceed with the wizzard.
-
Select the Use case.
-
Select the solvers you want to run (drag and drop them to the right side). You can add as many as you want, and additionally, you can add the same solver multieple times.

-
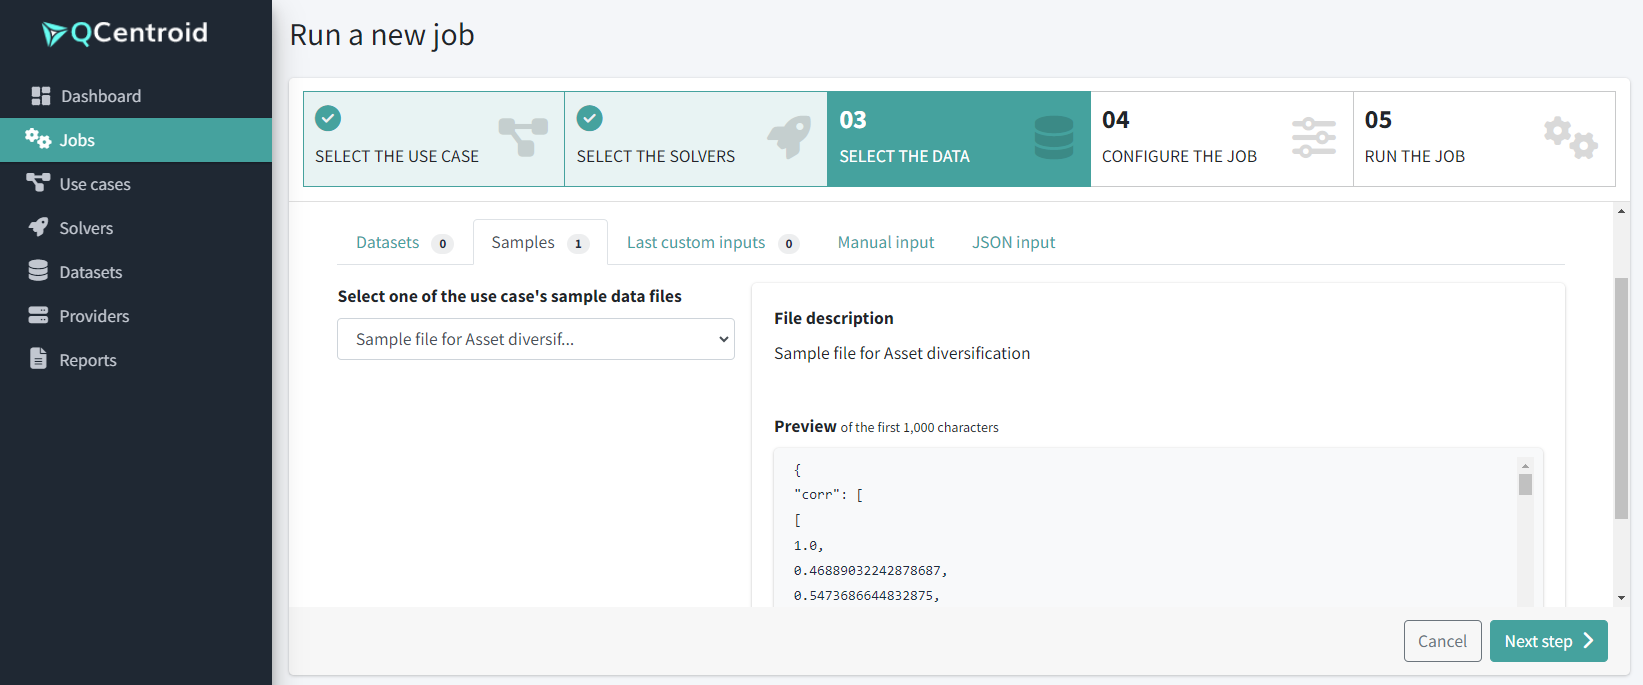
Select the input data for this execution. Options include:
- Datasets: Choose a file from the uploded data files.
- Sample datasets: Select one of the sample data files provided with this use case.
- Last inputs: Easily reuse a recent input with a single click.
- Custom input: copy-paste or write the input data in JSON format, or fill in the input data form.
-
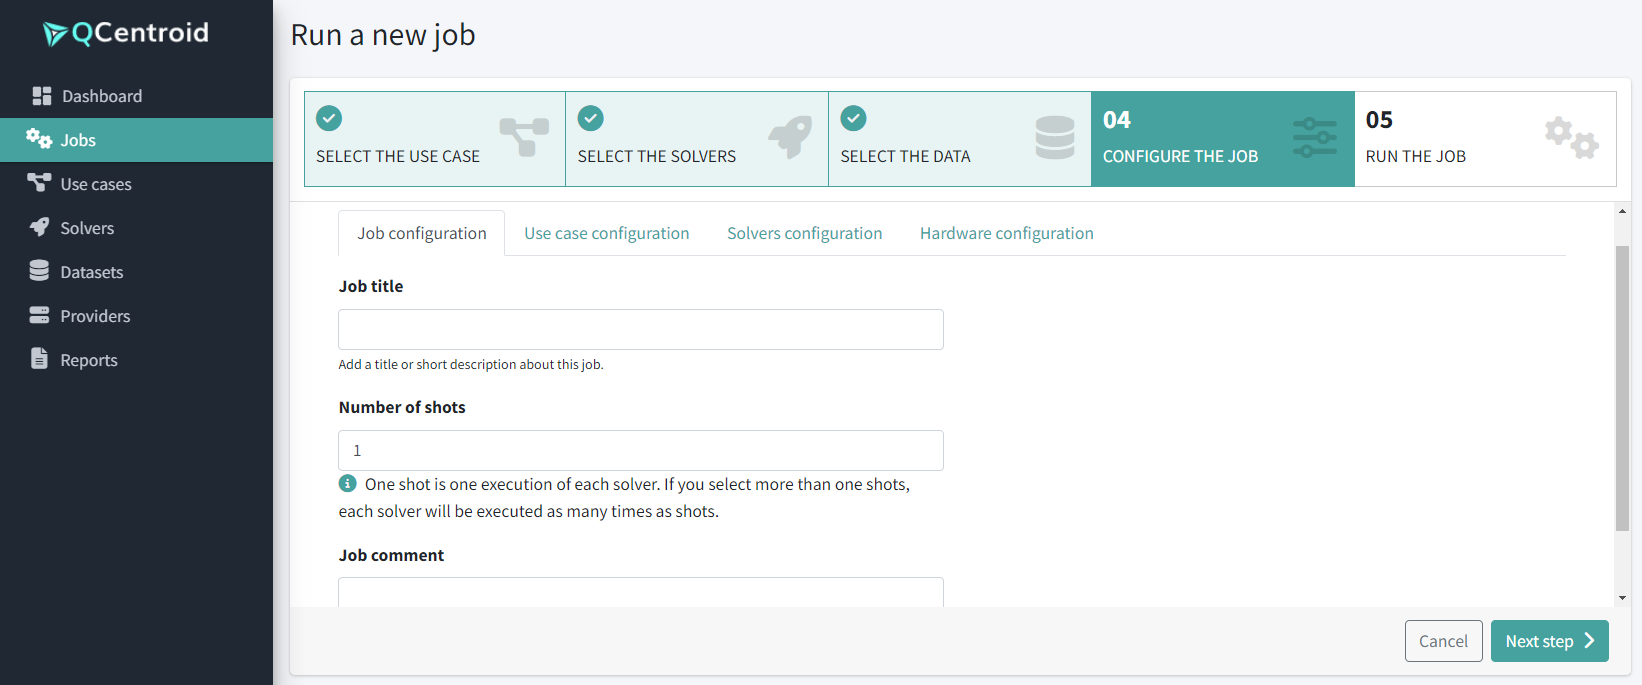
Provide final job configuration details, including job title and the desired number of shots. Additionaly, you can adjust the hardware configuration for each solver.
-
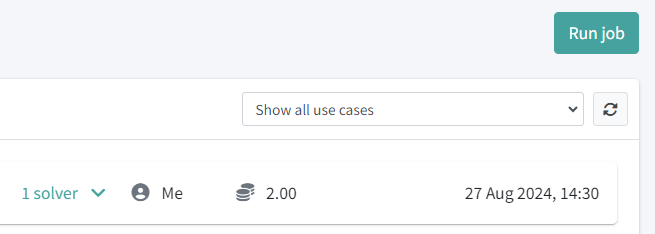
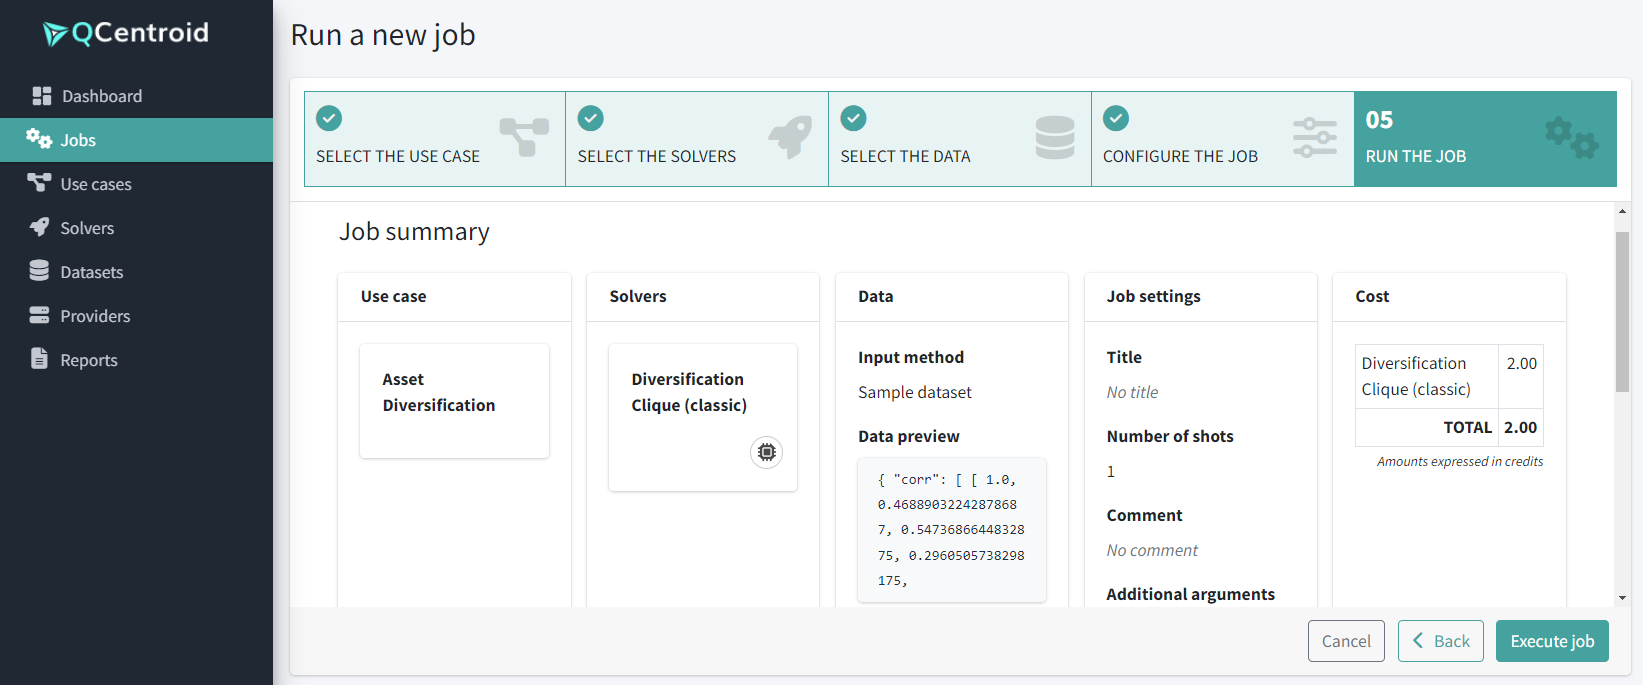
Review the job summary:
-
And click the Execute job button.
You will receive a notification on the top-right corner confirming that a new job has been launched.
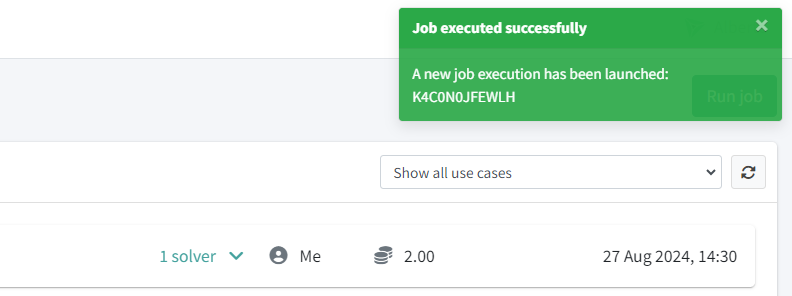
Just wait untill the job is in status Finished and click on it to see the job results.