Run your first job#
Now that you have created a use case and a solver, you can run your first job.
No-code run job wizzard#
Let’s run your first job by following these steps:
-
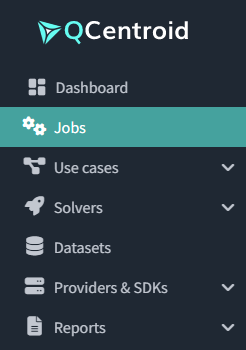
Navigate to the Jobs section via the left-side menu.
-
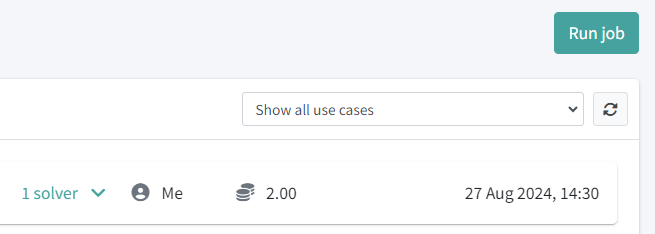
Click the Run job button on the top-right corner, and proceed with the wizzard.
-
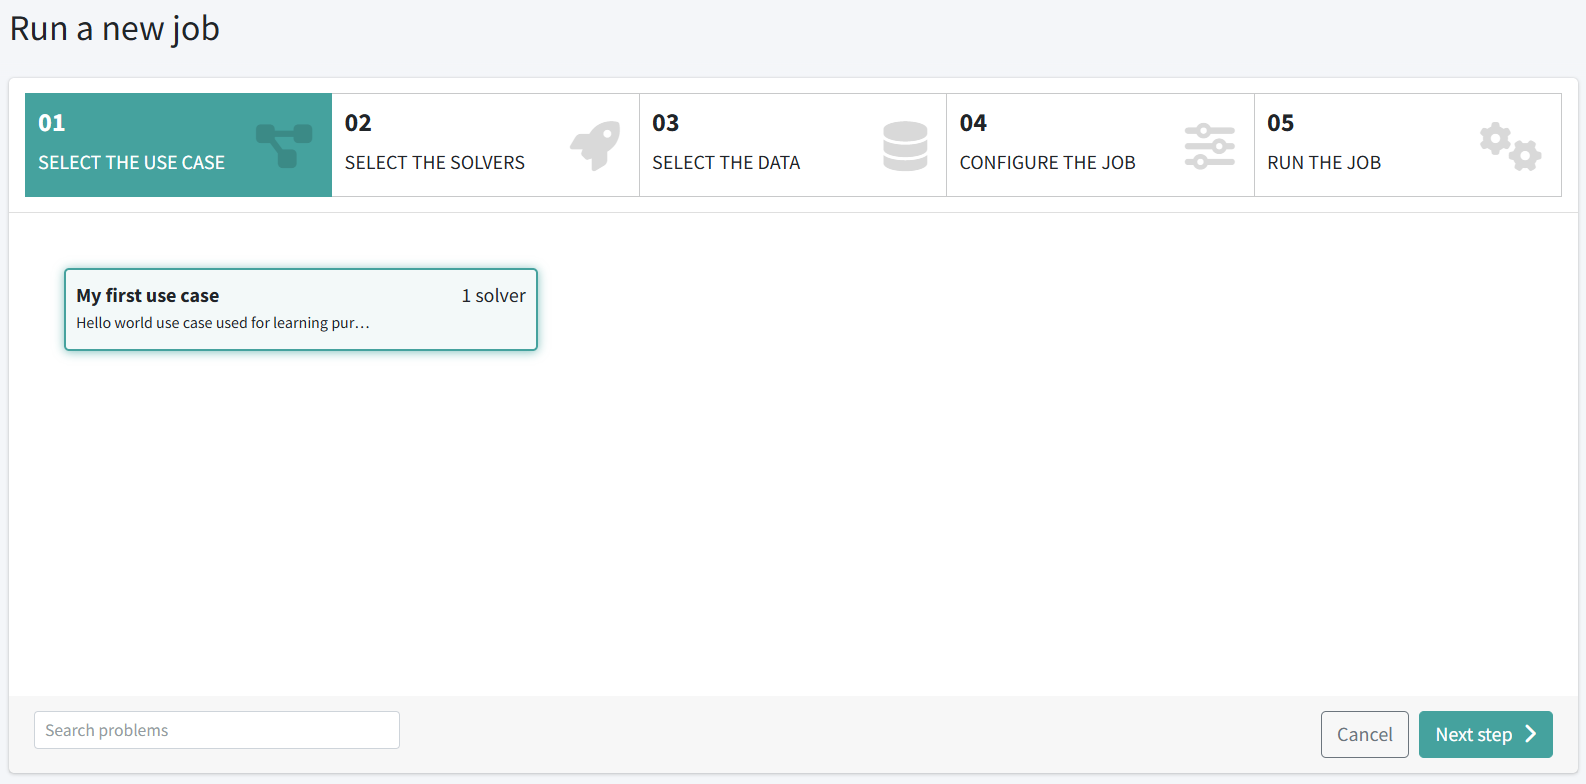
Click on the My first use case use case and click on the Next step button.
-
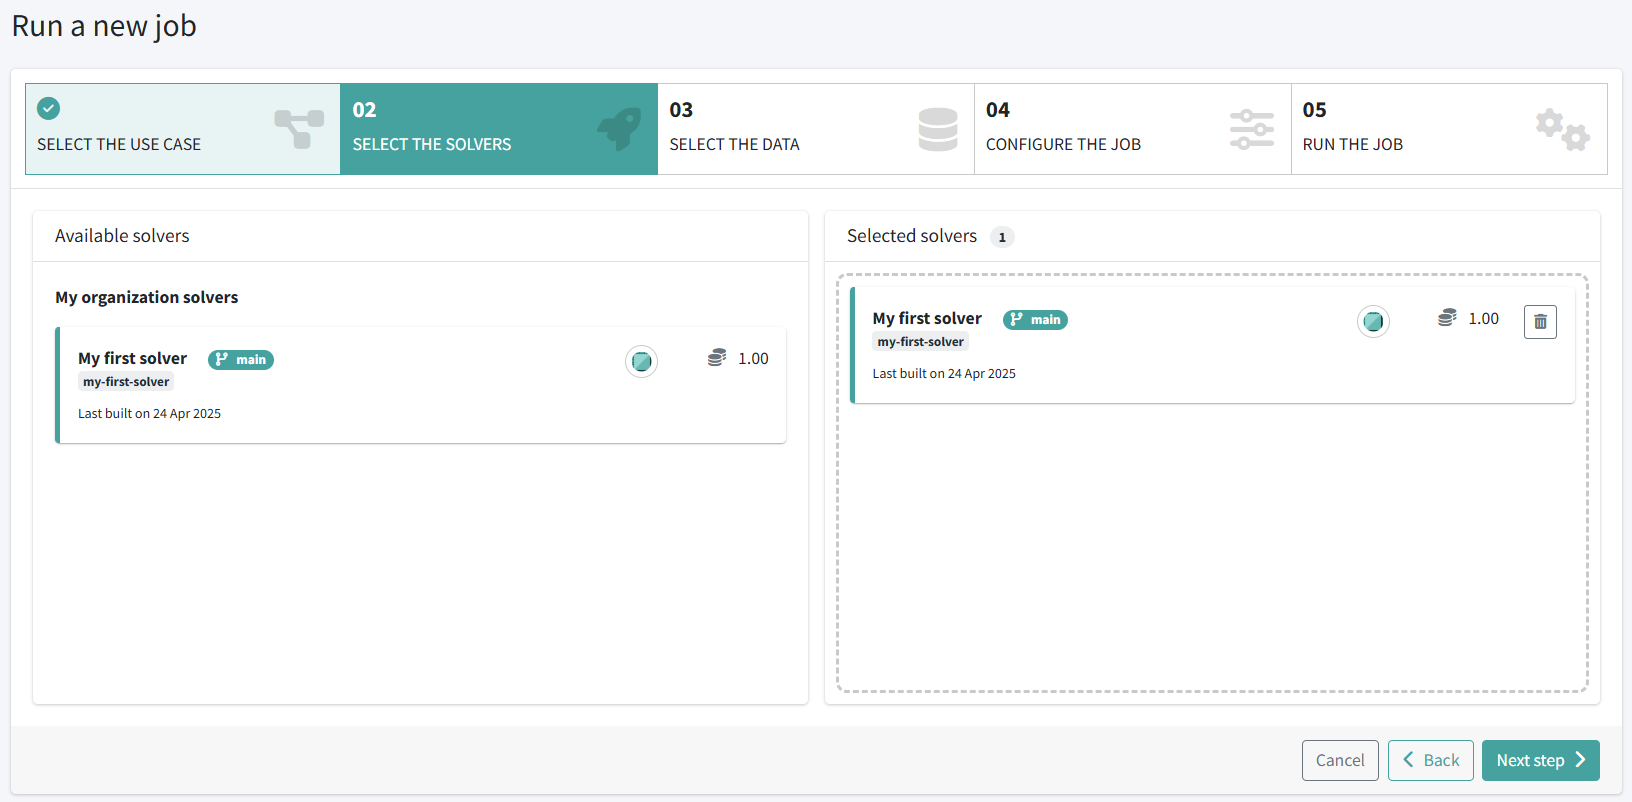
Select the solver My first solver (drag and drop it to the right side) and click on the Next step button.
-
Enter the input data for this job by clicking in the JSON input tab and then type the following JSON data:
And click on the Next step button.{"my-input": "hello"}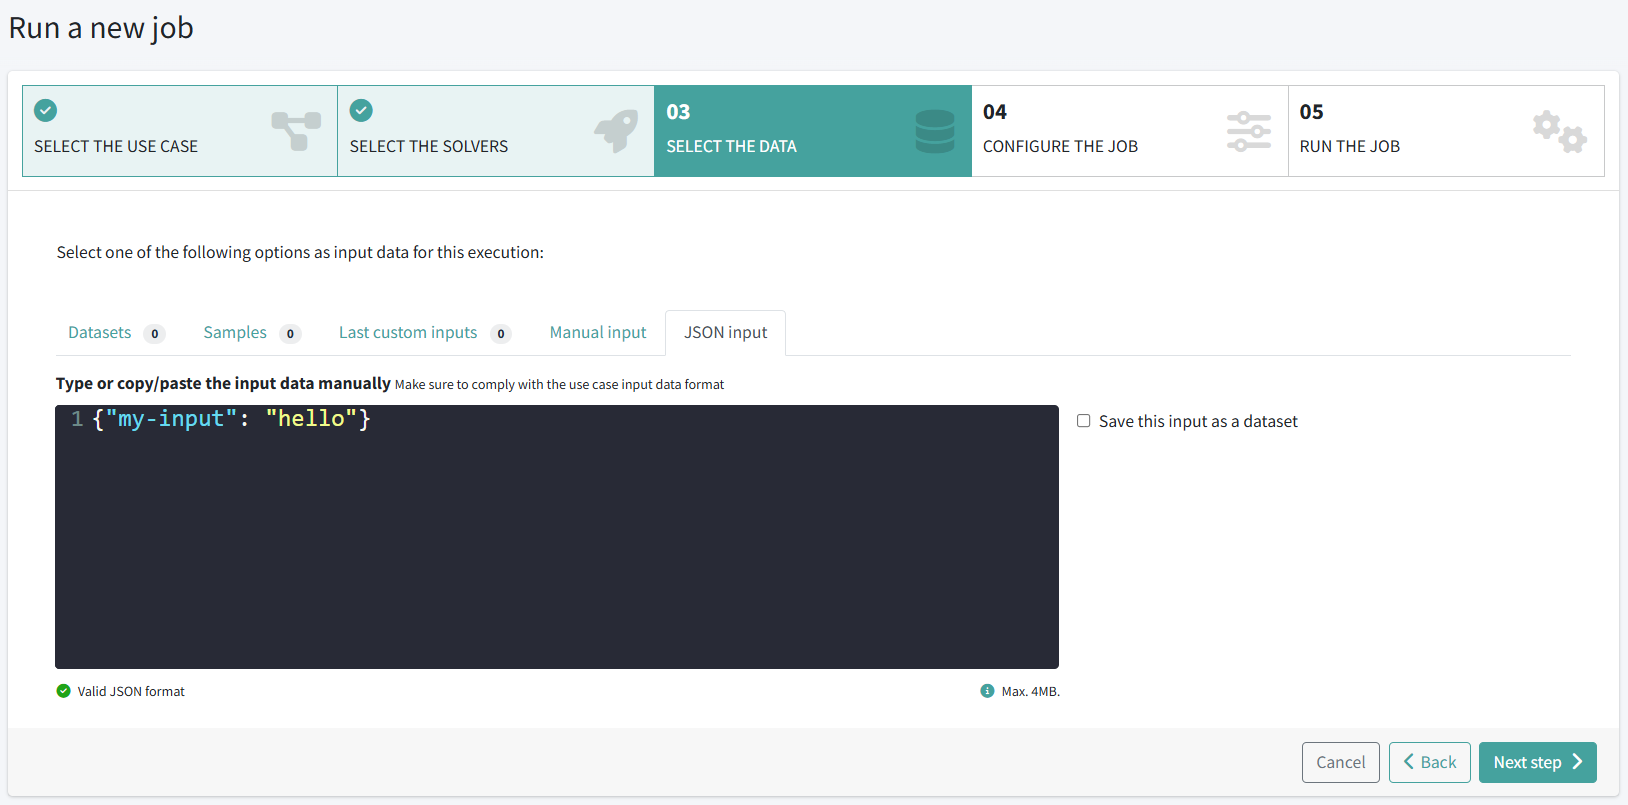
-
Write a title for this job and leave the number of shots as 1. Leave all the rest of parameters as they come by default. Click on the Next step button.

-
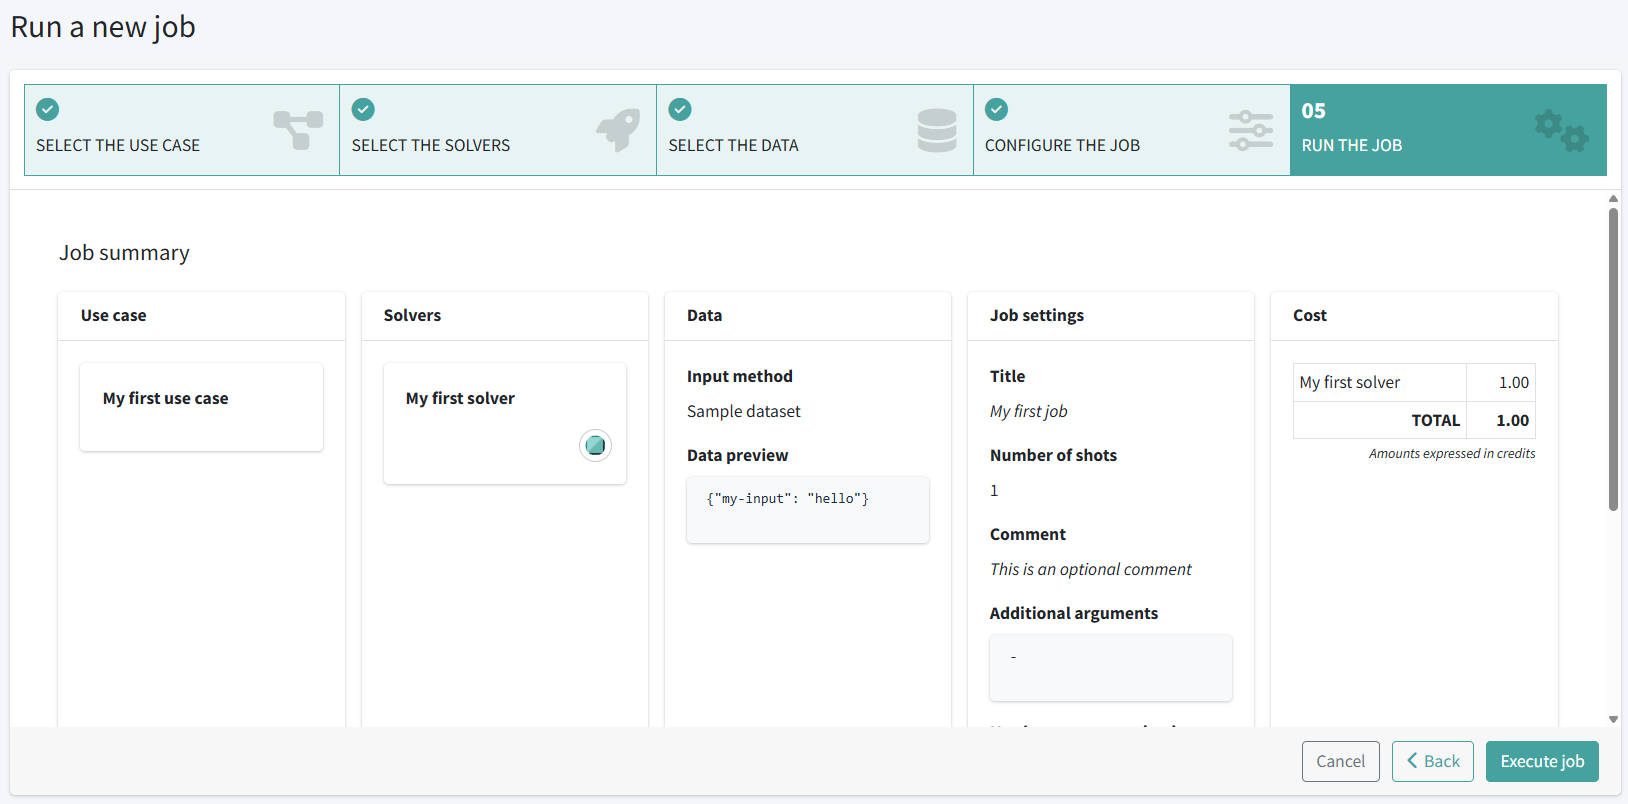
Review the job summary:
-
And click the Execute job button.
You will get a notification on the top-right corner confirming that a new job has been launched and it will appear in status Pending or Running.
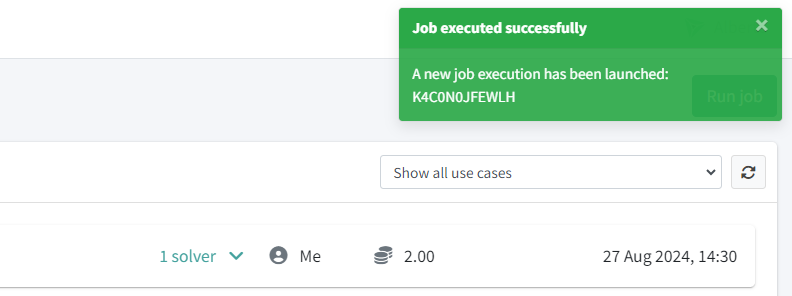
Just wait until the job is in status Finished.
What you’ve learned#
Now you know how to run a job from QCentroid Platform dashboard without writing code.
You also know that running a job through the dashboard takes 5 steps:
Selecting the use case.
Selecting the solvers to run.
Selecting/entering the input data.
Setting the configuration parameters, including the job title.
Reviewing the summary to make sure everything is correct.
What’s next#
The last step in this tutorial will be to explore the results you got from your job execution.